Quick access
Getting started
Welcome to RainbowTaskbar! To get RainbowTaskbar, visit this link.
This will bring you to the latest version. Choose either the 32-bit (rnbtsk.exe) or the 64-bit (rnbtsk-x64.exe) version. If you do not have .NET 6 installed,
the program will automatically prompt you to install it.
RainbowTaskbar is a portable app, so there is no installation procedure.
RainbowTaskbar is a portable app, so there is no installation procedure.
Behind the scenes
To understand certain terminology and more about the instructions, you first have to know the structure of RainbowTaskbar.
RainbowTaskbar's graphics work by applying an underlay, the same size (and shape, if rounded) as the taskbar, right under it.
 In the image above, I have separated the underlay from the taskbar, so you can see what is actually happening.
Layers
Layers are a new feature in the .NET version of RainbowTaskbar. Layers allow you to stack over different controls freely.
There is a limited number of 16 layers, 0-15.
Layers also allow you to clear a single part of all the visible controls, allowing for dynamic text/images (probably in combination with the API).
Layers also allow you to clear a single part of all the visible controls, allowing for dynamic text/images (probably in combination with the API).
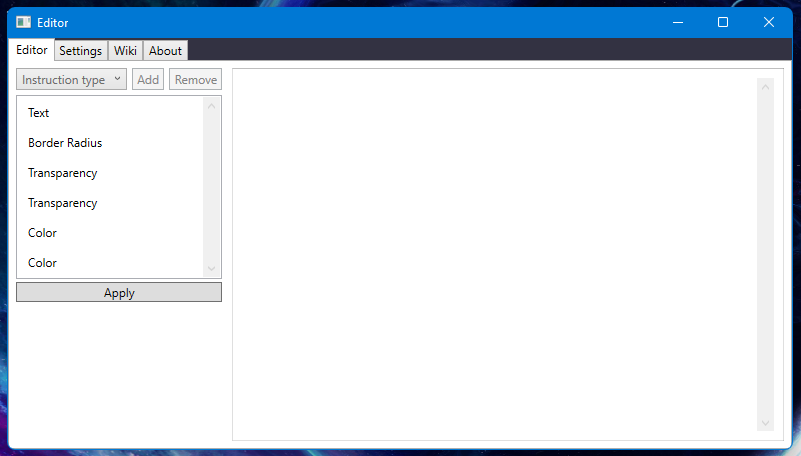
The editor
 RainbowTaskbar will automatically choose the Rainbow preset on first usage.
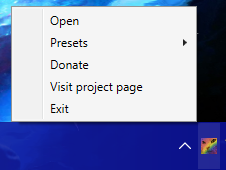
To open the editor, locate the tray icon, and double-click it or right-click and choose "Open".
You can also try out the included presets, by hovering over the "Presets" option in the tray menu, and choosing one.
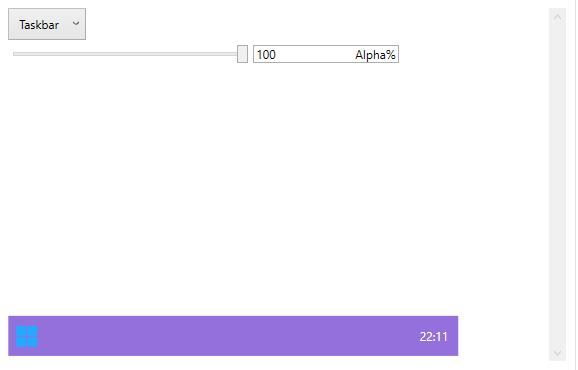
Transparency instruction
The transparency instruction allows you to set the opacity of the real taskbar (Taskbar), the underlay (RainbowTaskbar) and the different layers (Layer).
Another feature of this instruction is setting the taskbar style (Style).
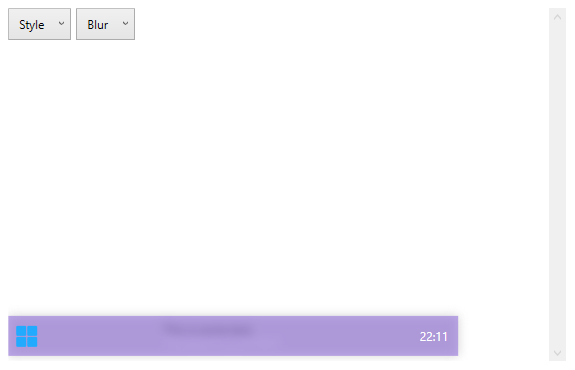
Taskbar styles
Taskbar styles are set using the transparency instruction. They allow you to customize the appearance of the actual taskbar.
There are 3 available styles:
You can easily preview taskbar styles in the editor.
There are 3 available styles:
- Default - default taskbar style
- Blur - colorless blur style
- Transparent - completely see-through style
You can easily preview taskbar styles in the editor.
Color instruction
The color instruction is the fundamental instruction of RainbowTaskbar. It is one of the oldest instructions, along with the transparency instruction.
The color instruction supports solid color or 2 color gradients, along with the option of fading and a few selectable transitions.
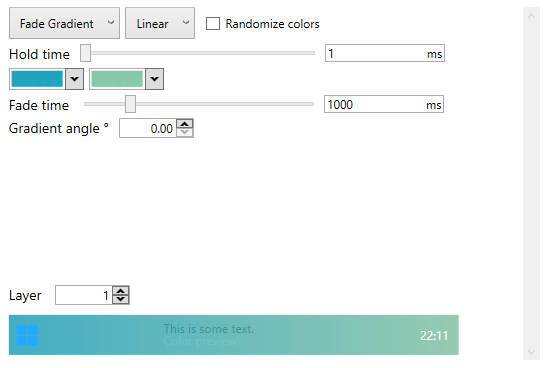

The color instruction supports solid color or 2 color gradients, along with the option of fading and a few selectable transitions.
Fade transitions
Fade transitions are available in color instructions of type Fade or FadeGradinet.
There are 5 available transitions:
There are 5 available transitions:
- Linear - default
- Sine
- Cubic
- Exponential
- Back
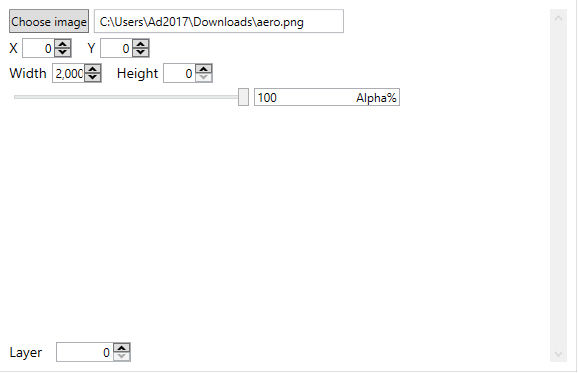
Image instruction
The image instruction allows you to display images on the taskbar. You can position and stretch the images to a selected size or keep the original size by setting width and height to 0.
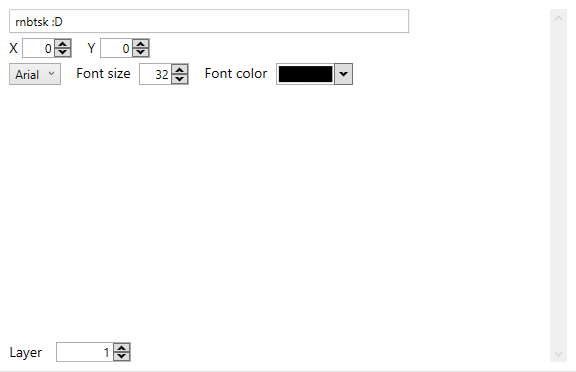
Text instruction
The text instruction allows you to display text on the taskbar at a position. The editor automatically gives you a list of all the available fonts in the system.
HTTP API
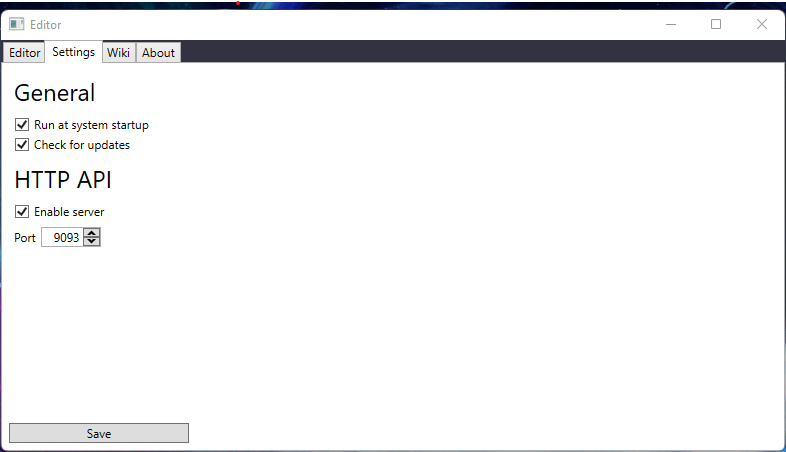
The HTTP API can be enabled in the settings window. It is disabled by default.
All results are JSON-encoded.
All results are JSON-encoded.
GET
/config - Returns the contents the config class.
/instructions - Returns the current instruction list.
/instruction?position=n - Returns the instruction at index n.
{
  "data": {
    "ConfigFileVersion": 1,
    "IsAPIEnabled": true,
    "APIPort": 9093,
    "RunAtStartup": true,
    "Instructions": [
      {
        "Name": "TransparencyInstruction",
        "Opacity": 0.8,
        "Layer": 0,
        "Style": 0,
        "Type": 1
      },
    ...
    ],
    "success": true
  }
}
{
    "data": [
      {
        "Name": "TransparencyInstruction",
        "Opacity": 0.8,
        "Layer": 0,
        "Style": 0,
        "Type": 1
      },
      ...
      ],
      "success": true
    }
}
{
  "data": {
    "Name": "TransparencyInstruction",
    "Opacity": 1.0,
    "Layer": 0,
    "Style": 2,
    "Type": 3
  },
  "success": "true"
}
POST
Request data is type application/json. All POST requests return {"success": true} unless an error occurs.
/clearinstruction {"Position":n} - Deletes the instruction at index n.
/clearinstructions - Deletes all of the instructions.
/addinstruction {"Position":(Optional), "Name":InstructionClassName, ...} - Adds a new instruction to the list.
/executeinstruction {"Name":InstructionClassName, ...} - Executes an instruction instantly.
/goto {"Position": n} - Changes current executing instruction index to n.
/saveconfig - Saves the current config.
/loadconfig - Reloads the config from file.
To successfully encode an instruction in JSON, use the reference below, keeping in mind that the class name has to be referenced in the "Name" parameter. Integer values of 0 can be omitted, as they are usually the default value.
BorderRadiusInstruction
int Radius - border radius in px
DelayInstruction
int Time - time in ms
ClearLayerInstruction
int Layer - layer number
ColorInstruction
int Time - hold time
bool Randomize - if true => randomize colors, ignores color1, color2 values
string Color1 - color in hex
int Effect - 0=Solid; 1=Fade; 2=Gradient; 3=Fade Gradient
string Color2 - color in hex; used if effect is 2 or 3
int Time2 - used if effect is 1 or 3
int Transition - 0=Linear; 1=Sine; 2=Cubic; 3=Exponential; 4=Back
double Angle - gradient angle; used if effect is 2 or 3
TransparencyInstruction
int Type - 0=Taskbar; 1=RainbowTaskbar; 2=All (taskbar and underlay); 3=Style; 4=Layer
double Opacity - opacity of the element, 0-1; used if type is 0,1 or 2
int Style - 0=Default (default taskbar); 1=Transparent; 2=Blur; used if type is 3
int Layer - layer number; used if type is 4
ImageInstruction
int Layer - layer on which the image is rendered
string Path - path to image (png,bmp,jpg)
int X - x pos
int Y - y pos
int Width - width, 0 is original
int Height - height, 0 is original
double Opacity - transparency, 0-1
ClearLayerInstruction
int Layer - layer on which the text is drawn
string Text - text content
int X - x pos
int Y - y pos
string Font - font to use, default is "Arial"
int Size - font size in px
string Color - color in hex
Refer to instructions above.
WebSocket
For events, one can also connect to the /rnbws WebSocket, and send the subscribe command.{"command":"subscribe", "value": true/false}